How to cut and reconnect your LED Strips using solderless connectors
If you’re looking to expand your circuits by cutting your strips and adding extensions, you might want to use our solderless connectors. These were designed to be used by anyone, regardless of their ability to solder wires. Here’s how to install them and how to make sure it works properly.
Before you start, please be aware that modifying or cutting your LED Strip voids its warranty. Therefore, we ask that you carefully test and inspect your Strip to ensure that it is fully functional prior to cutting it.
First thing you have to do is make sure you cut your strip at the right spot. You can find it at every 3 LEDs where there’s a line indicator surrounded by exposed copper spots on both sides. Cut the strip precisely on that line with a good pair of scissors or a sharp work knife.
Now you have to fully expose the copper connector spots on the strip, which means that you have to remove all the silicone cover on that area. Make a small incision beside the LED (in the silicone only, don’t get all the way to the actual strip) and peel off as much silicone as you can. Then, clean the strip thoroughly with rubbing alcohol and a small brush. If there is some silicone left on top of the copper connectors, it won’t work properly. Also, make sure to remove the glue from the bottom of the strip as it will prevent the solderless connector to slide easily in place.
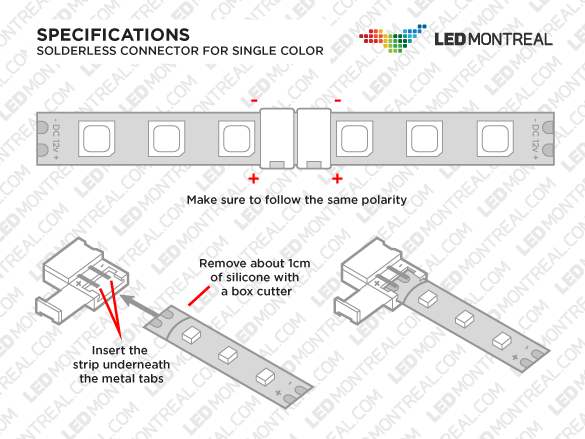
Once this is done, slide the exposed strip part inside the solderless connector, the copper connectors under the little metal clamps. Apply some pressure on the metallic pins with a ball point pen. You have to make sure that they are pushing down on the contacts. You can also try adding a small piece of electric tape on top of the metallic pins so when you close the plastic top, it will give you some padding which will help pushing the pins down on the connectors.
Repeat the same process for the other side of the solderless connector. Also, it’s very important to make sure you respect the polarity when reconnecting your pieces of strip (R, G, B and V+ have to match).
There you go, you’ve extended your LED Strip circuit!
